My Timesheet
The My Timesheet menu provides an overview of logged work hours in a structured calendar format, allowing users to efficiently track their daily and monthly work hours. It ensures clear visibility into work schedules, seamless JIRA integration, and efficient tracking of time logs and absences.
Key Features
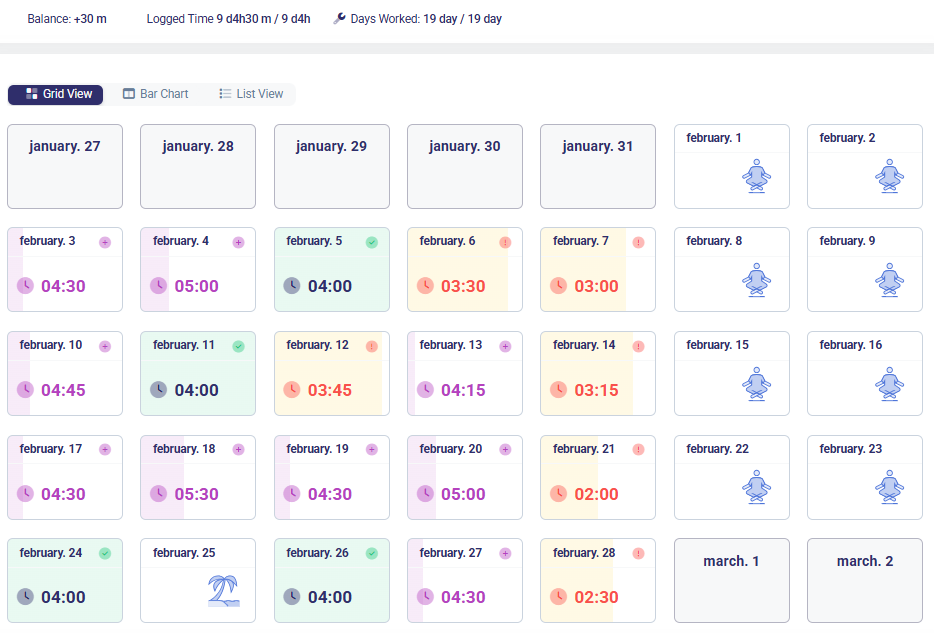
- Grid View Calendar – Displays the current month in a daily breakdown, showing logged hours per day.
- Month Selection – Users can switch between months using a dropdown menu.
- Work Hours Export – Logged hours can be exported for reporting purposes.
- Leave & Day Off Indications:
- Vacation days are marked with a palm tree icon.
- Non-working days are represented by a relaxing figure icon.
- JIRA Integration:
- Displays the last JIRA synchronization timestamp.
- Includes a manual sync button to update JIRA data.
- Detailed Time Log Modal:
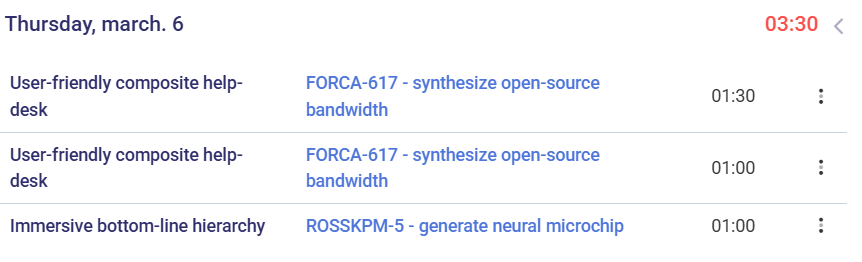
- Clicking on a logged day opens a detailed view, showing:
- Project name
- JIRA ticket name
- Logged hours
- Clicking on a logged day opens a detailed view, showing:
How to Use
-
Navigate to the My Timesheet menu → Click on My Timesheet in the left menu.
-
Select a month → Users can switch between months using a dropdown menu or navigate horizontally with the arrow buttons.

-
Review daily work hours → Check the hours logged per day in Grid or List View or choose Bar Chart.
-
View Detailed Time Logs → Click a day with logged hours (indicated by a colored time badge). A modal opens showing task-level details:
- Project name
- JIRA Ticket reference
- Logged hours
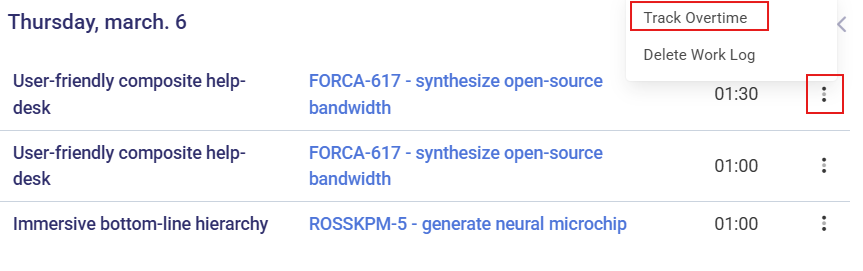
- Request Overtime from Logged Entries
- Click to a day to expand the detailed log.
- Click the three-dot menu (⋮) next to the relevant time entry.
- Select Track Overtime to open the overtime request form.
- Fill in:
- Ticket (pre-filled, readonly)
- Time (pre-filled from log entry, readonly)
- Type: Choose from dropdown, types:
- No Overtime – Time entry is not considered overtime.
- Shift Overtime – For compensatory time off.
- Payment – For paid overtime.
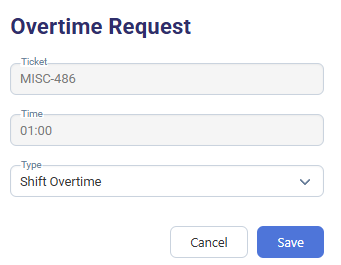
- Click Save to submit the overtime request.
- Revoking an Overtime Request
-
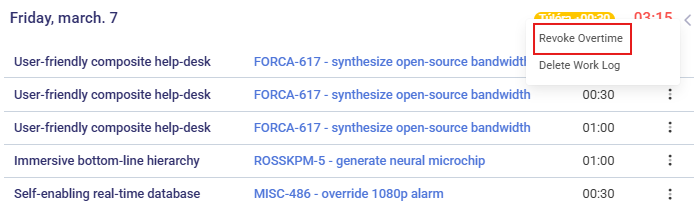
If a work log has an existing overtime request, a yellow overtime tag (e.g., Túlóra +00:30) appears next to the day total.

-
Click the three-dot menu next to the overtime-tagged entry.
-
Choose Revoke Overtime.
-
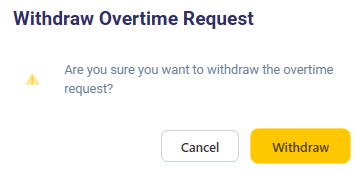
Confirm the action in the pop-up:
-
-
“Do you want to revoke the overtime request?”
-
Click Yes to proceed or Cancel to abort.
- Sync with JIRA (if applicable) → Click the Update button to update logged time from JIRA.

- View detailed time logs → Click on any logged day to see project-specific time tracking details.

- Export work hours → Use the Export button to download timesheet data for reporting purposes.

Typical Use Cases
- Viewing logged work hours for the current month or specific days.
- Checking which JIRA ticket time was logged on.
- Analyzing overall performance by comparing expected vs. logged hours.