Settings
Forecastify has several admin level settings available, this page details their configuration options.
Rate Levels
Overview
The Rate Levels menu in Forecastify enables administrators to define and manage employee rate levels for financial calculations. These rates determine hourly costs or billing amounts for different employees and positions, ensuring accurate budgeting and cost tracking. A structured Rate Levels system streamlines financial planning, enhances transparency, and improves accuracy in project budgeting and payroll management.
Key Features
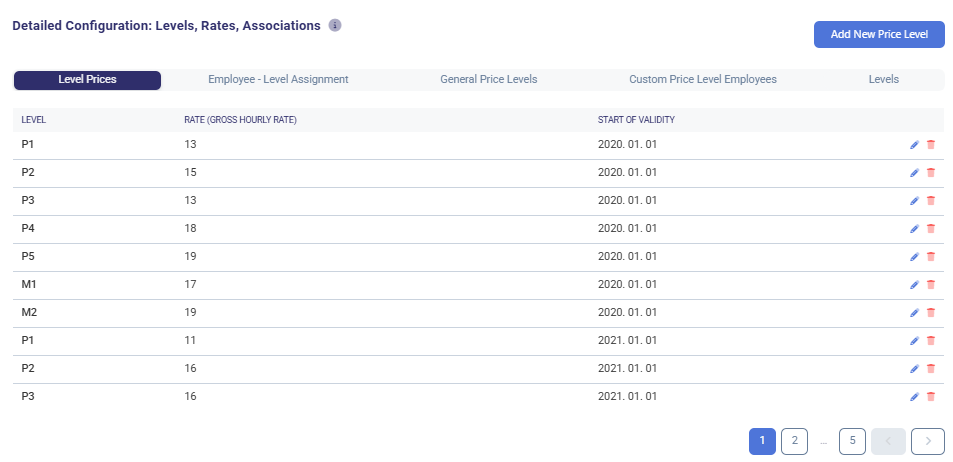
- Level Prices
- Define standard hourly rates for different levels.
- Set the start date of validity for each rate level.
- Import or export rate level data.
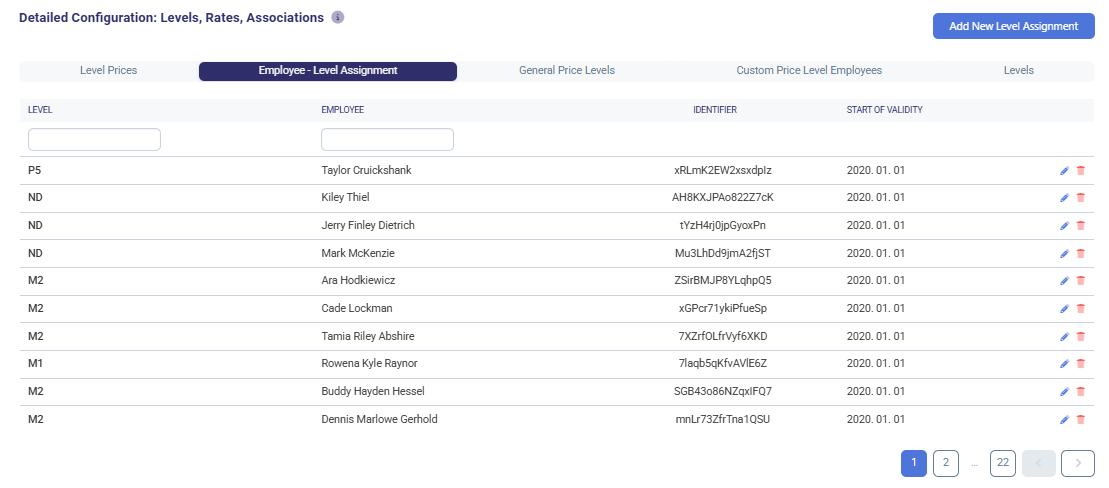
- Employee-Level Assignment
- Assign employees to specific rate levels.
- Manage employees who do not have a defined rate level.
- Include external and former colleagues in rate level assignments.
- General Price Levels
- Configure organization-wide general price levels.
- Adjust price levels to reflect company-wide changes in billing or cost rates.
- Custom Price Level Employees
- Define specific price levels for individual employees if they differ from standard rates.
- Adjust and manage custom rates based on employee roles or agreements.
- Levels Management
- Define and categorize different rate levels (e.g., Professional Level 1, Manager Level 2).
- Edit or delete existing levels as required.
How to Use
-
Navigate to Settings > Rate Levels.

-
Review the General Price Level section for default rates.

-
Check Level Rates for detailed rate breakdowns by category.

-
Check Employees Without an Assigned Level
-
The system highlights employees without assigned levels under Employees Without a Level in red.
-
Assign appropriate levels using the Employee-Level Assignment tab (see details below) to ensure accurate financial calculations.

-
-
Use the Detailed Configuration table to view:
- Level Prices (hourly rates per level)
- Employee-Level Assignments
- Custom Price Level Employees
- General Price Levels
-
Manage Level Prices
-
Go to the Level Prices tab.
-
Edit or delete existing price levels as needed.

-
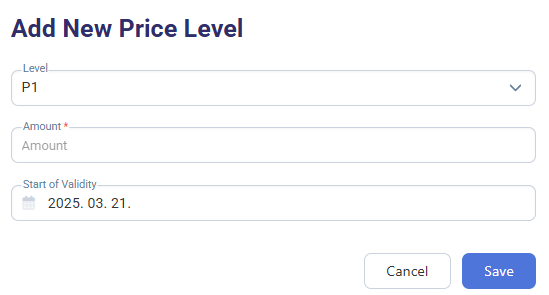
Click Add New Price Level to create a new level.

-
Enter the amount, start date of validity, and level category.
-
Save the new rate level.
-
-
Check and Assign Employees to Rate Levels
-
Go to the Employee-Level Assignment tab.
-
Review which employees already have a rate level assigned.
-
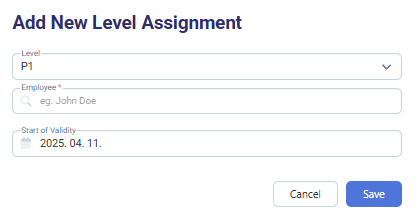
Use the Add New Level Assignment button to assign a level to employees who are currently unassigned.

-
Ensure all employees have a valid level to support accurate rate-based calculations and reporting.
-
-
Configure General Price Levels
- Access the General Price Levels tab.
- View Existing Levels - The list displays levels, corresponding hourly rates, and start validity dates.
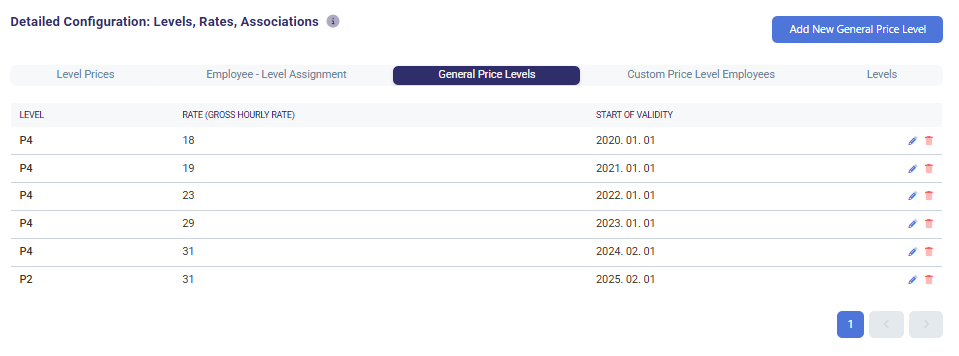
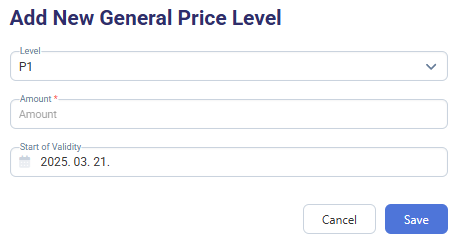
- Add a New General Price Level
-
Click Add New General Price Level.

-
Enter the Level Name, Hourly Rate Amount, and Start of Validity.
-
Click Save to confirm.
-
Ensure consistency across all financial planning calculations.
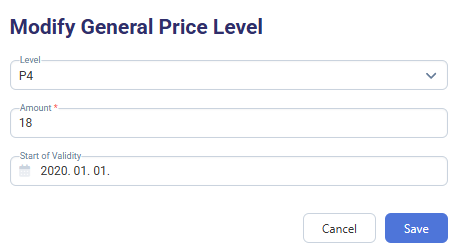
- Modify an Existing General Price Level
-
Click the Edit (
 icon) next to the price level.
-
Adjust the rate or validity period as needed.
-
Click Save to apply changes.
- Delete a Price Level
-
Click the Trash (
 ) icon next to an entry.
 -
Confirm deletion.

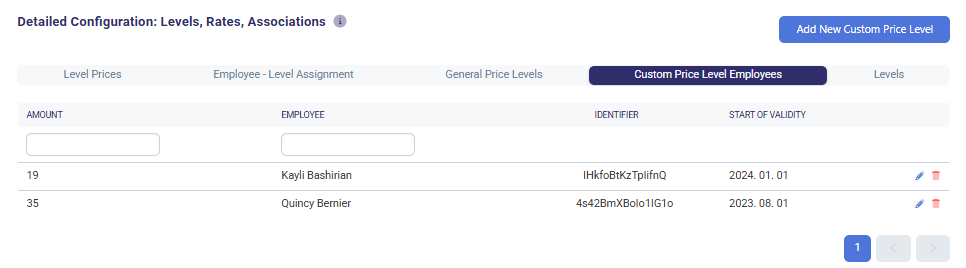
- Manage Custom Employee Rates
-
Open the Custom Price Level Employees tab.
-
View existing custom price levels assigned to employees.
-
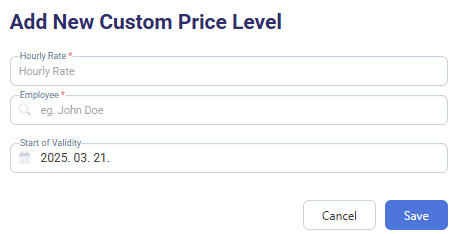
Add new custom price levels for specific employees as needed. Click Add New Custom Price Level to create a new rate.

-
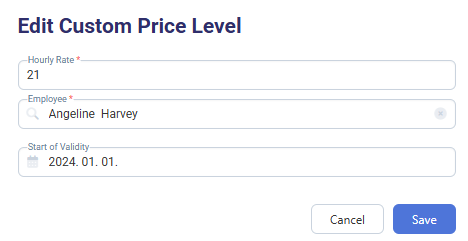
To modify an existing price level, click the edit (
) icon next to an entry.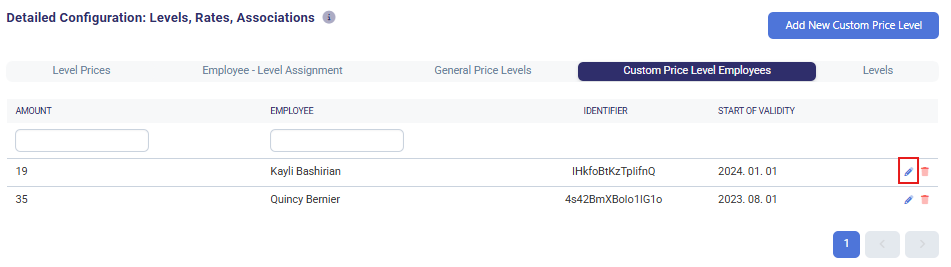
-
- Update the hourly rate as needed.
- Select or update the employee the rate applies to.
Set or adjust the validity period. (Ensure it aligns with internal policies.) - Click Save to apply the changes, or Cancel to discard them.
- Maintain Rate Level Structure
-
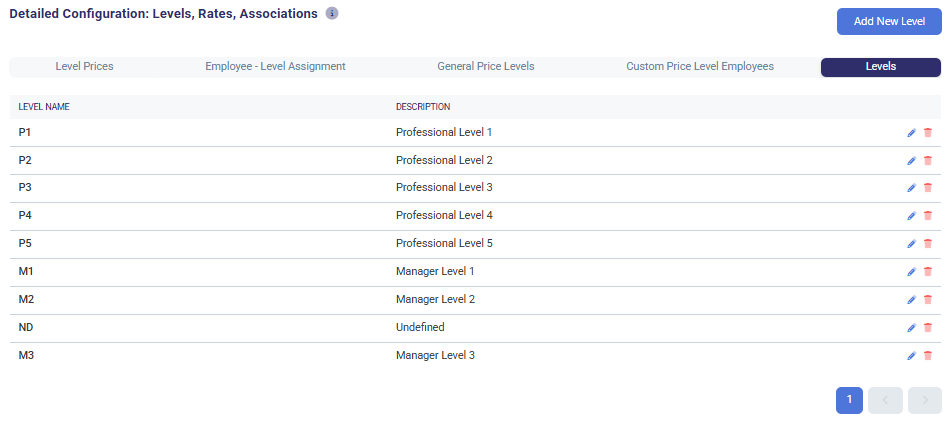
Visit the Levels tab to define hierarchical levels.
-
Review and Manage Levels -> Browse the existing levels and their descriptions. Levels can be edited or deleted if necessary.

-
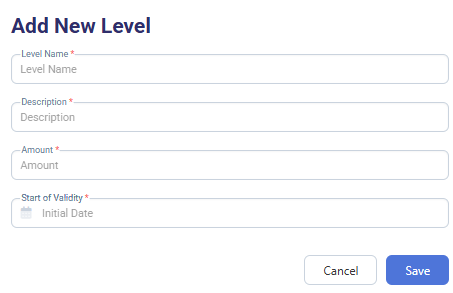
Add New Level -> Click Add New Level (top right button).

-
Fill in the following fields:
-
Level Name (e.g., P1, M2)
-
Description (e.g., Professional Level 1)
-
Amount (the applicable rate)
-
Start of Validity (initial effective date)
Click Save to create the new level.
Typical Use Cases
- Project Cost Estimation: Ensures accurate calculation of project budgets based on assigned employee rate levels.
- Financial Forecasting: Provides a structured approach to estimating labor costs over different time periods.
- Payroll and Billing Management: Supports HR and finance teams in tracking employee costs for payroll processing and client billing.
- Employee Rate Adjustments: Facilitates easy modifications in employee rate levels based on promotions, role changes, or new financial agreements.
Project Categories
Overview
The Project Categories section in Forecastify allows users to define and manage project classification attributes such as colors, main categories, and warning indicators. These classifications help in organizing and tracking projects based on predefined dimensions. This ensures that project managers can efficiently categorize, visualize, and track projects within Forecastify.
Key Features
- Color Assignment
- Assign specific colors to projects for visual differentiation.
- Filter projects by assigned colors.
- Add new colors using the Add New Color button.
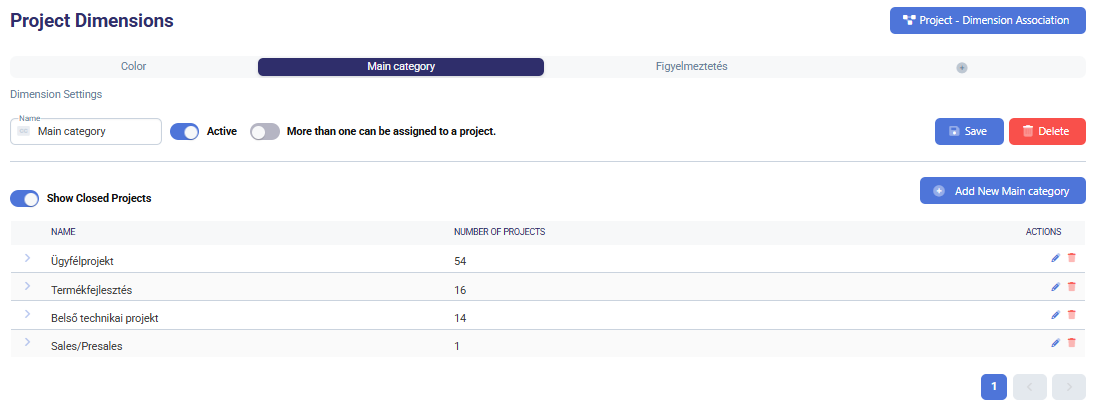
- Main Category Management
- Define and manage project categories (e.g., Client Project, Internal Development, Sales/Presales).
- Set the category as active or inactive.
- Allow multiple categories to be assigned to a project.
- View the number of projects associated with each category.
- Warning Labels
- Create and manage warning indicators for projects.
- Assign warning labels such as "Critical" or "Attention Needed."
- View associated projects under each warning category.
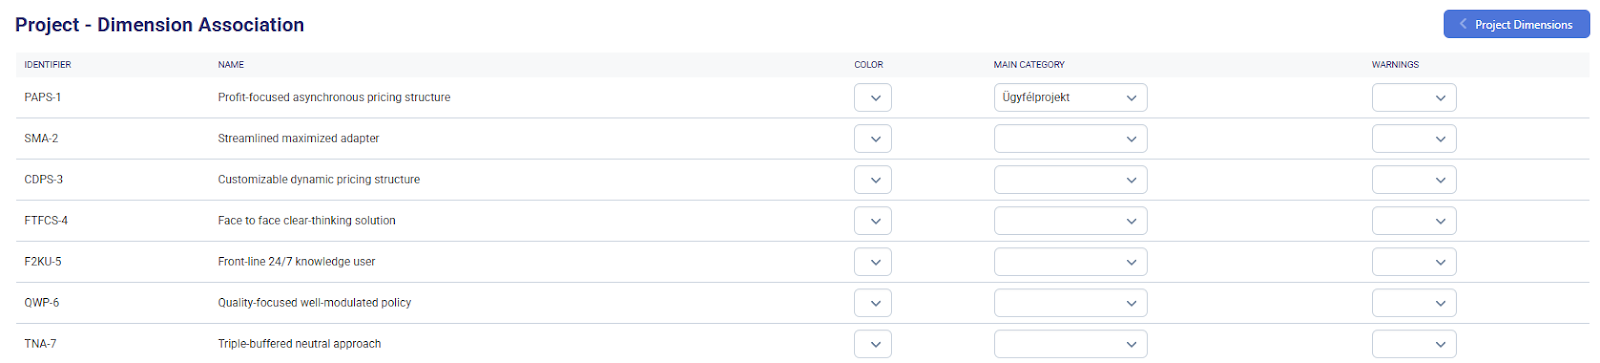
- Project Dimension Association
- Assign colors, categories, and warnings to projects.
- Modify project attributes in bulk through an interactive list.
- Easily adjust project classification settings from a structured interface.
How to Use
-
Assigning Colors to Projects
-
Navigate to Settings > Project Categories.

-
Open the Color tab.

-
Click Add New Color.

-
Define a new color and save it.
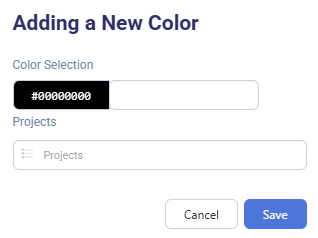
-
Assign the color to projects for visual categorization.
-
-
Defining a New Project Category
-
Click on the Main Category tab.

-
Enter a new category name and enable the "Active" switch.
-
(Optional) Allow multiple category assignments per project.
-
Click Save to store the category.
-
Edit or delete existing categories.
-
-
Managing Project Warnings
-
Select the Warnings (Figyelmeztetés) tab. The name of the tab is editable.

-
Enter a custom label name to define how the tab will appear.

-
Click Add New Name.

-
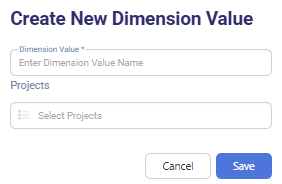
Enter a value name, select the relevant project(s), and click Save.
-
Edit or remove existing values.

-
-
Additional Dimension Tab (+)
- Create custom dimensions that help in advanced project categorization.
- Enter a custom name in the Dimension Name field. This label will be used as the tab name.
- (Optional) Toggle:
-
Active – if the dimension should be in use.
-
More than one can be assigned to a project – if multiple selections are allowed.
4. Once the name is filled in, click Create a Dimension to add a new category.

Note: If the name field is empty, the button will not function.
-
Delete Dimension as needed.

-
- Associating Dimensions with Projects
-
Navigate to Project - Dimension Association.

-
Select a project from the list.
-
Assign a color, category, and/or warning label using dropdown menus.
-
Typical Use Cases
- Project Organization: Classify projects by type (e.g., Internal, Client-based, Development) for easier management.
- Visual Differentiation: Use color coding to highlight specific project types or priorities.
- Risk Management: Assign warnings to flag critical or at-risk projects.
- Bulk Classification Updates: Modify multiple project attributes efficiently through the dimension association interface.
Project Master Data
Overview
The Project Master Data menu in Forecastify provides a structured framework for managing essential project attributes, ensuring consistency in financial tracking, reporting, and strategic decision-making. This menu allows users to define fundamental project properties, such as service types, sales types, revenue categories, technologies, task types, pricing models, and organizational types. By using the Project Master Data menu, organizations can maintain a well-structured and consistent approach to project categorization, revenue tracking, and financial planning.
Key Features
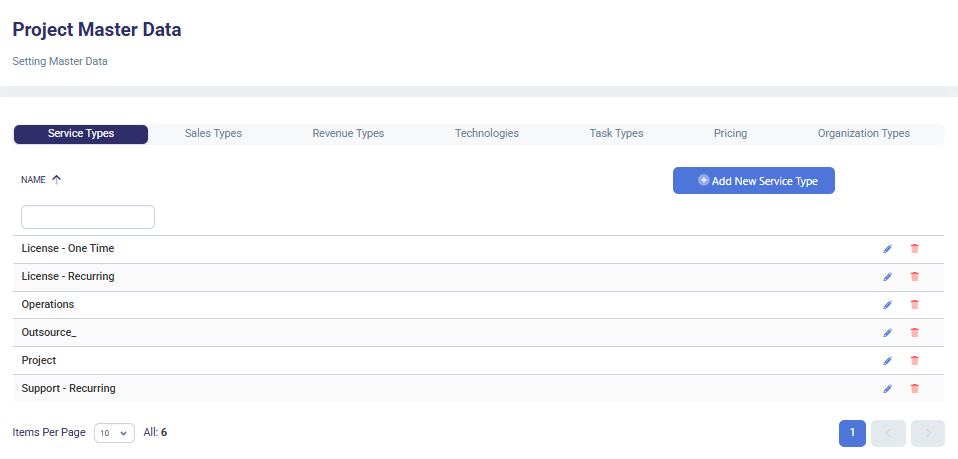
- Service Types
- Define and categorize different service offerings within projects.
- Examples: License (One-time), License (Recurring), Operations, Outsourcing, Project, Support (Recurring).
- Add new service types as needed.
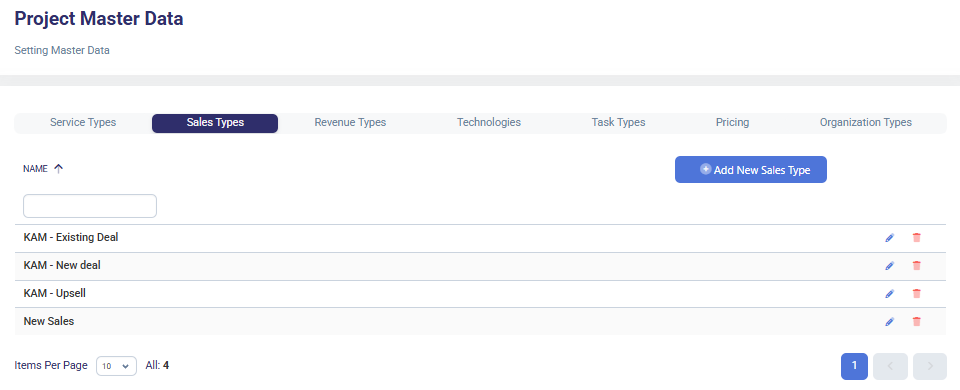
- Sales Types
- Manage different sales categories based on business needs.
- Examples: KAM - Existing Deal, KAM - New Deal, KAM - Upsell, New Sales.
- Allows adding custom sales types.
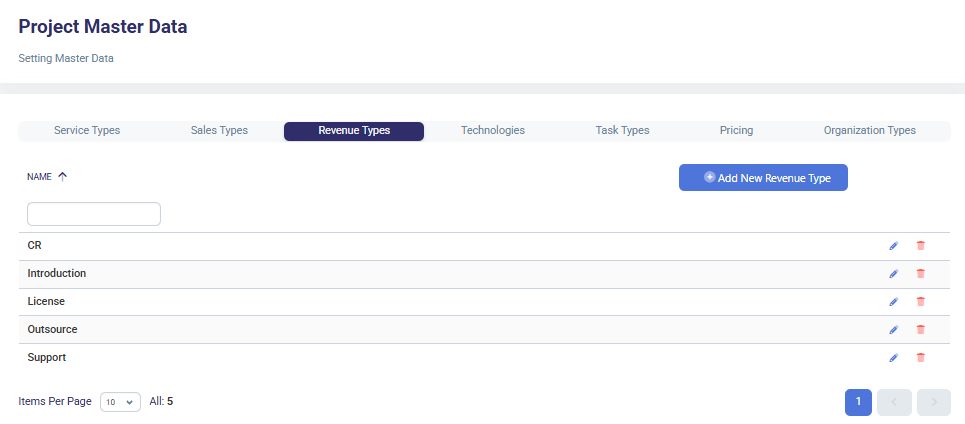
- Revenue Types
- Categorize different revenue streams related to projects.
- Examples: CR, Introduction, License, Outsource, Support.
- Enables easy revenue tracking and financial analysis.
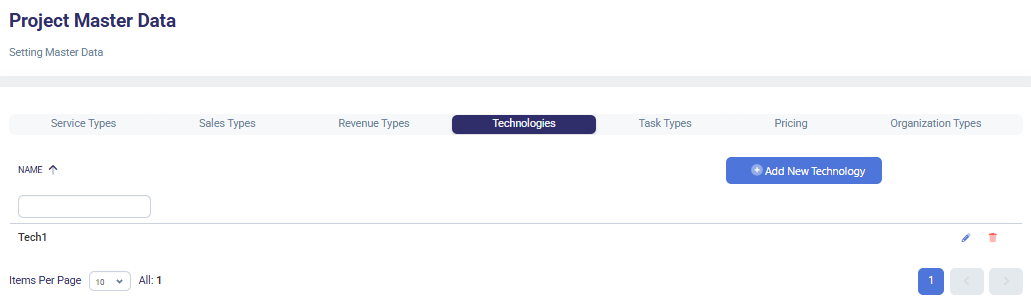
- Technologies
- Maintain a list of technologies associated with projects.
- Helps in technology-based project categorization.
- Add new technologies as required.
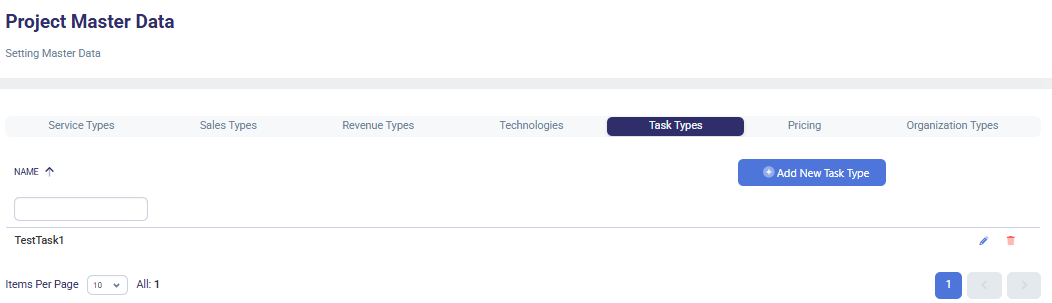
- Task Types
- Define different task categories within projects.
- Allows structured task management for improved efficiency.
- Users can add new task types.
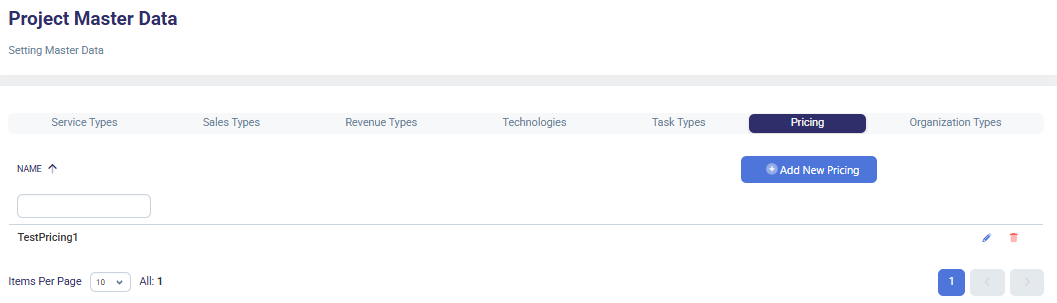
- Pricing
- Manage project pricing structures.
- Add new pricing models to fit different project needs.
- Supports dynamic pricing adjustments.
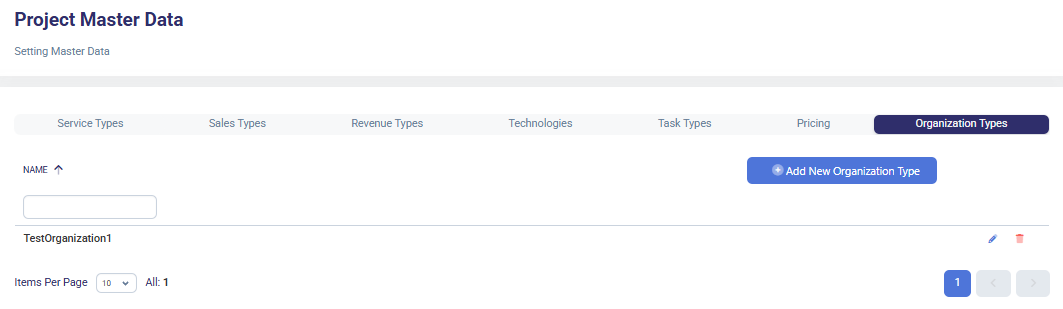
- Organization Types
- Define various organization categories related to projects.
- Supports project classification based on organizational structure.
- Allows adding new organization types as needed.
How to Use
-
Navigate to Settings > Project Master Data.

-
Define Service Types
-
Navigate to the Service Types tab.
-
Add, edit or delete service types.
-
-
Set Up Sales Types
-
Access the Sales Types tab.
-
Create, edit or remove sales categories.
-
-
Categorize Revenue Types
-
Open the Revenue Types tab.
-
Define revenue classifications by adding, editing, deleting Revenue Types based on project requirements.
-
-
Manage Technologies
-
Navigate to the Technologies tab.
-
Add, edit or remove relevant technologies used within projects.
-
-
Define Task Types
-
Access the Task Types tab.
-
Add, edit or remove structured task categories for streamlined project tracking.
-
-
Manage Pricing
-
Navigate to the Pricing tab.
-
Define, update or remove pricing models as per project needs.
-
-
Configure Organization Types
-
Open the Organization Types tab.
-
Add, edit or remove organizational classifications for project management.
-
Typical Use Cases
- Project Classification: Ensures standardized project attributes for consistent reporting.
- Sales & Revenue Tracking: Helps finance teams track sales and revenue sources effectively.
- Technology Mapping: Enables technology-based project categorization.
- Task Management: Facilitates efficient tracking of project tasks.
- Flexible Pricing Models: Allows businesses to define pricing structures tailored to different clients and services.
- Organizational Structuring: Supports better project segmentation based on organization types.
Other Settings
Overview
The Settings menu in Forecastify provides administrators and users with configuration tools to manage key system parameters, including overtime policies, client data, locations, login activity, admin settings, and role permissions. This section ensures smooth system operation, policy enforcement, and user access management. This ensures that system administrators and users can effectively manage configurations and access settings within Forecastify.
Key Features
-
Overtime Policies
- Define different overtime policies with customizable multipliers.
- Activate or deactivate specific overtime rules as needed.
-
Clients
- Manage client information, including identifiers and company names.
- Add, edit, or remove clients from the system.
-
Locations
- Configure work locations, including remote and on-site offices.
- Assign location-specific identifiers and define optional settings.
-
Login Activity
- Monitor active user sessions and track login records.
- Identify system access details, including browser and operating system data.
-
Admin Settings
- Configure enterprise-level system settings.
- Define project risk KPI limits and currency preferences.
-
Roles & Permissions
- Create and manage role-based access control.
- Assign specific permissions for PTO management, requests, and approvals.
How to Use
-
Select the Relevant Menu

-
Managing Overtime Policies
-
Navigate to Overtime Policies under Settings.
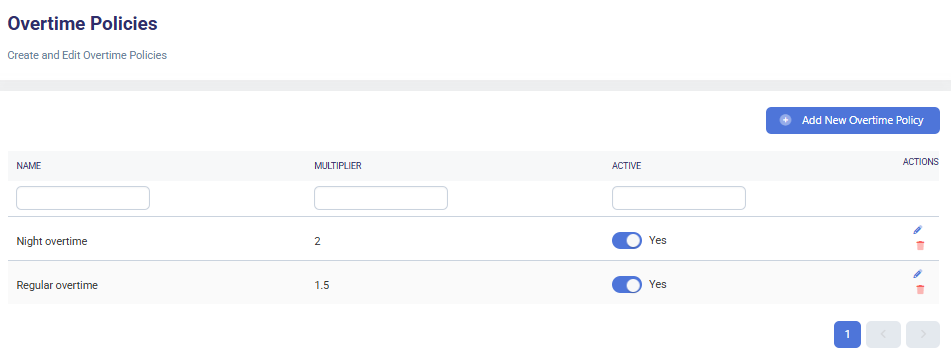
-
Add a new policy by specifying a name and multiplier.
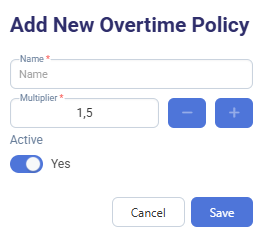
-
Edit or remove items.

-
Toggle the policy’s active status as required.

-
-
Setting Up Clients
-
Go to the Clients section.
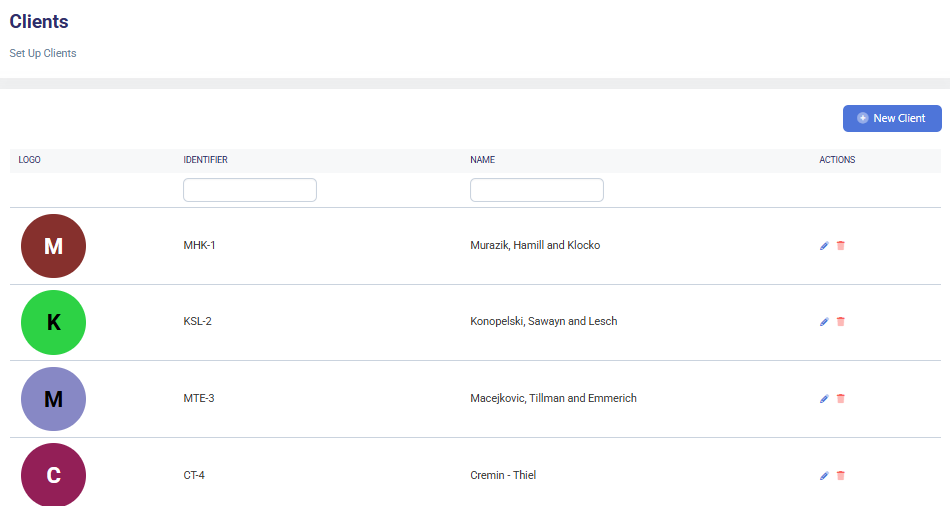
-
Click on New Client and input client details.
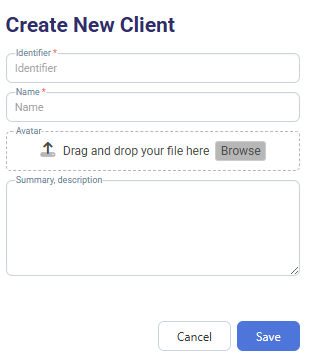
-
Edit or delete existing client entries.
-
-
Configuring Locations
- Open the Locations menu.
- Define location identifiers, colors, and optional settings.
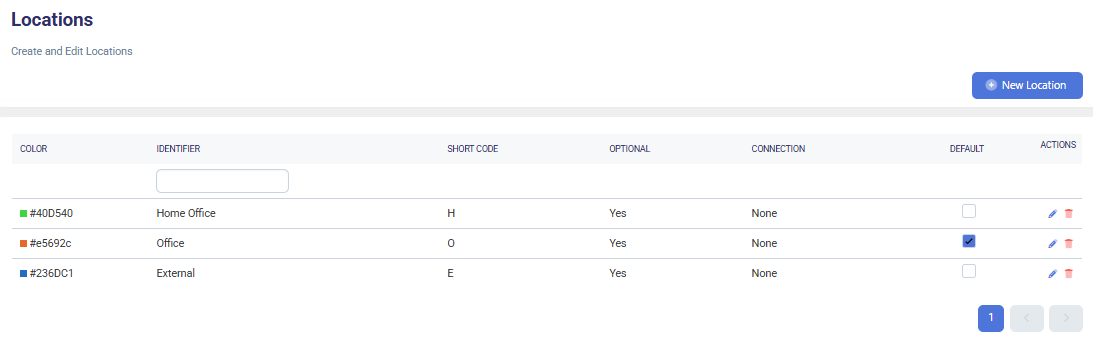
- Click on New Location and input location details.
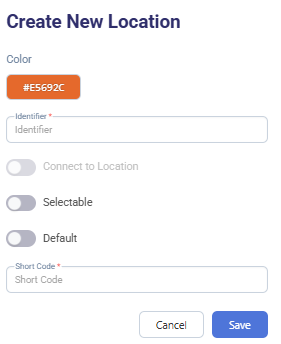
- Edit or remove locations as needed.
-
Monitoring Login Activity
- Select Login Activity from the Settings menu.
- View active user sessions and login records.
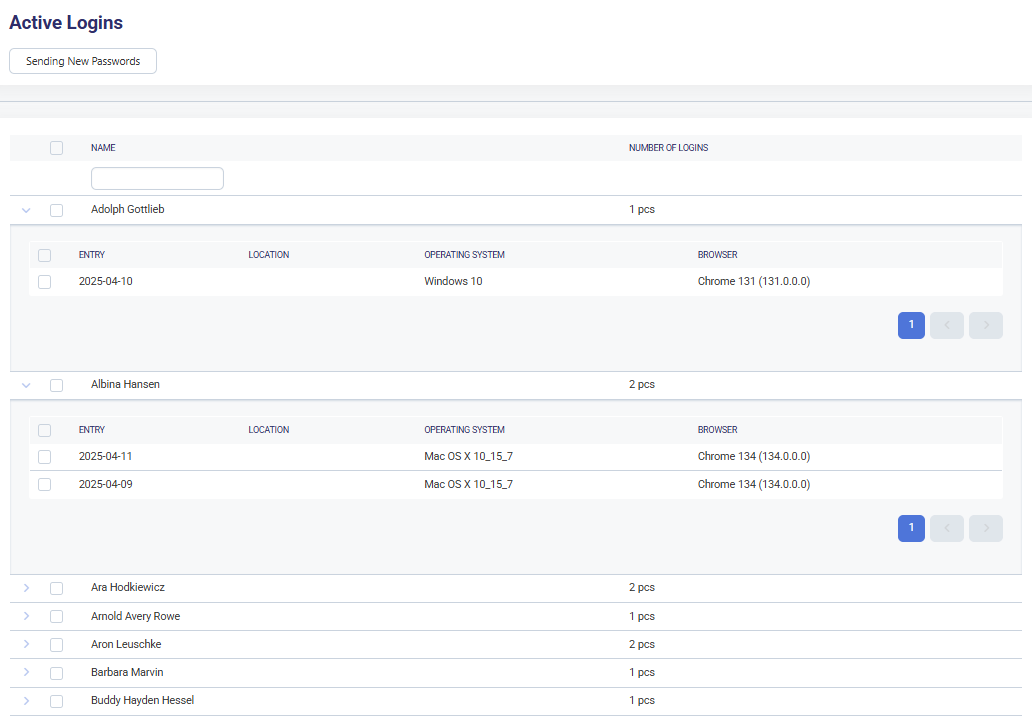
- Send new passwords or remove inactive users.

-
Updating Admin Settings
- Access Admin Settings.
-
Select the desired tab:
-
Enterprise: to configure KPI limits and currency
-
Issue Tracking: to integrate with external task management tools (e.g., Jira, YouTrack)
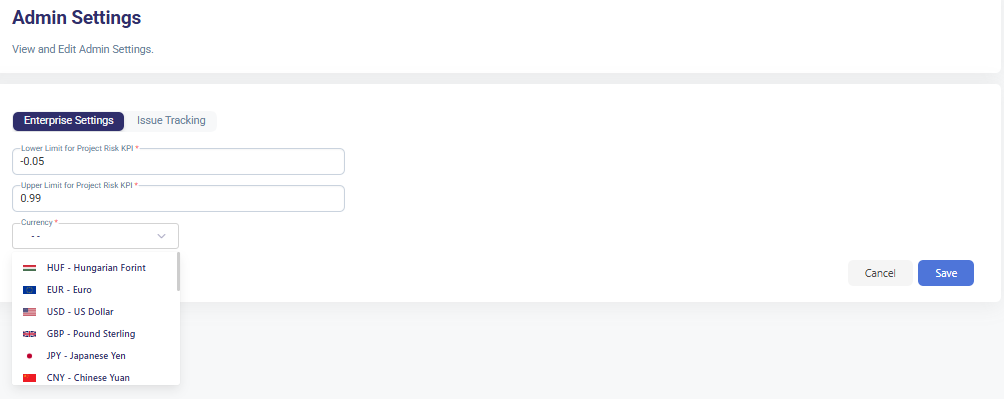
- Edit Enterprise Settings
-
-
Click the Enterprise tab.
-
Adjust the following fields:
- Lower Limit for Project Risk KPI: numeric value (e.g.,
0.05) - Upper Limit for Project Risk KPI: numeric value (e.g.,
0.15) - Currency: select from a dropdown list (e.g., EUR, USD, HUF, etc.)
💡Note: These values are applied system-wide to control KPI calculations and currency-based logic.
- Lower Limit for Project Risk KPI: numeric value (e.g.,
-
Save changes to update system-wide configurations.
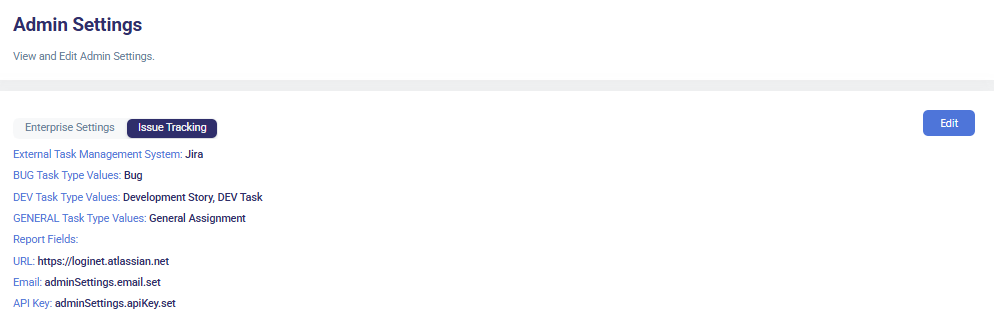
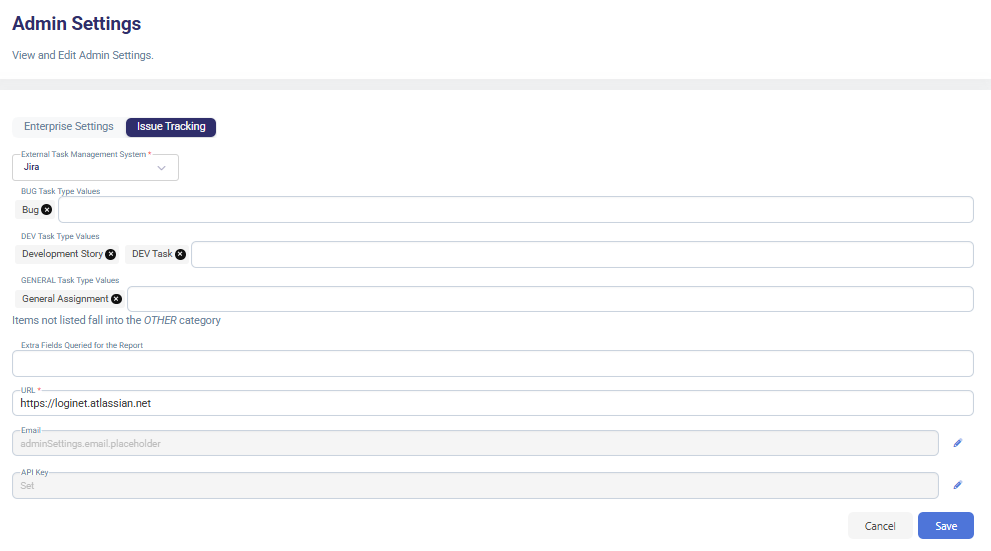
- Edit Issue Tracking Settings
-
Switch to the Issue Tracking tab.
-
Select the External Task Management System (e.g., Jira, Forecastify, YouTrack).
-
Define task type mappings for easier categorization:
- BUG Task Type Values (e.g.,
Bug) - DEV Task Type Values (e.g.,
Development Story,DEV Task) - GENERAL Task Type Values (e.g.,
General Assignment)
- BUG Task Type Values (e.g.,
-
Optional: Fill in or modify integration parameters (e.g., Jira URL, email, API key).
🛠️Note: All unmapped task types will fall under the Other category. -
Click Save to store your configurations.
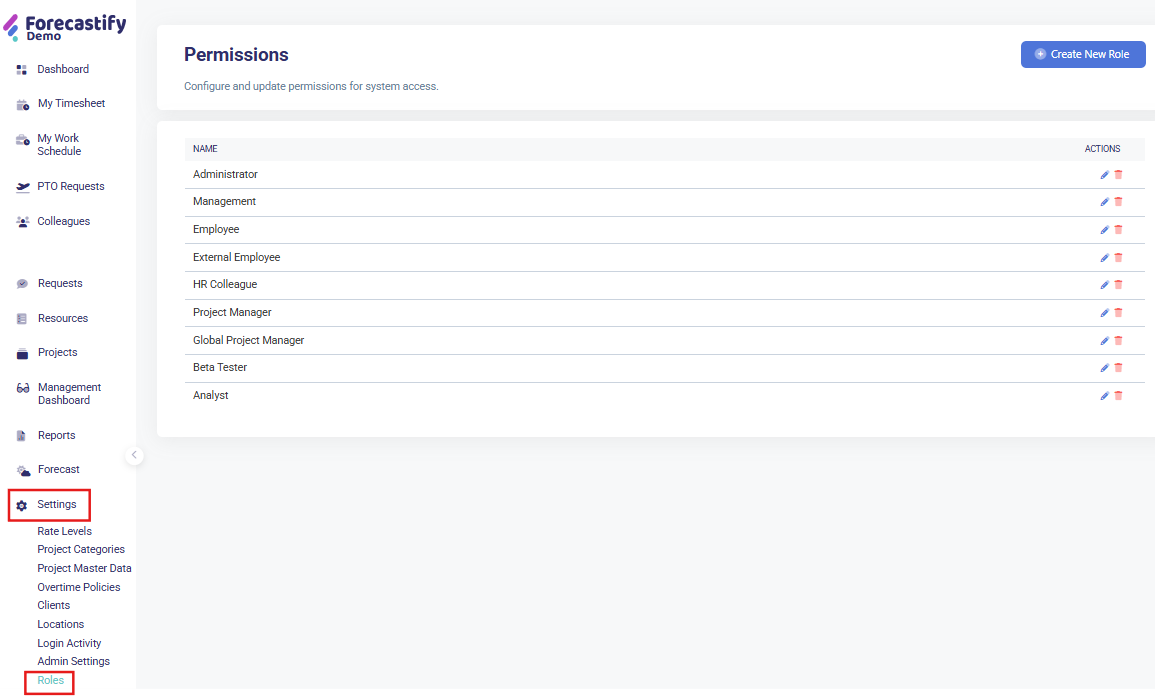
- Managing Roles & Permissions
-
Navigate to Settings > Roles.
-
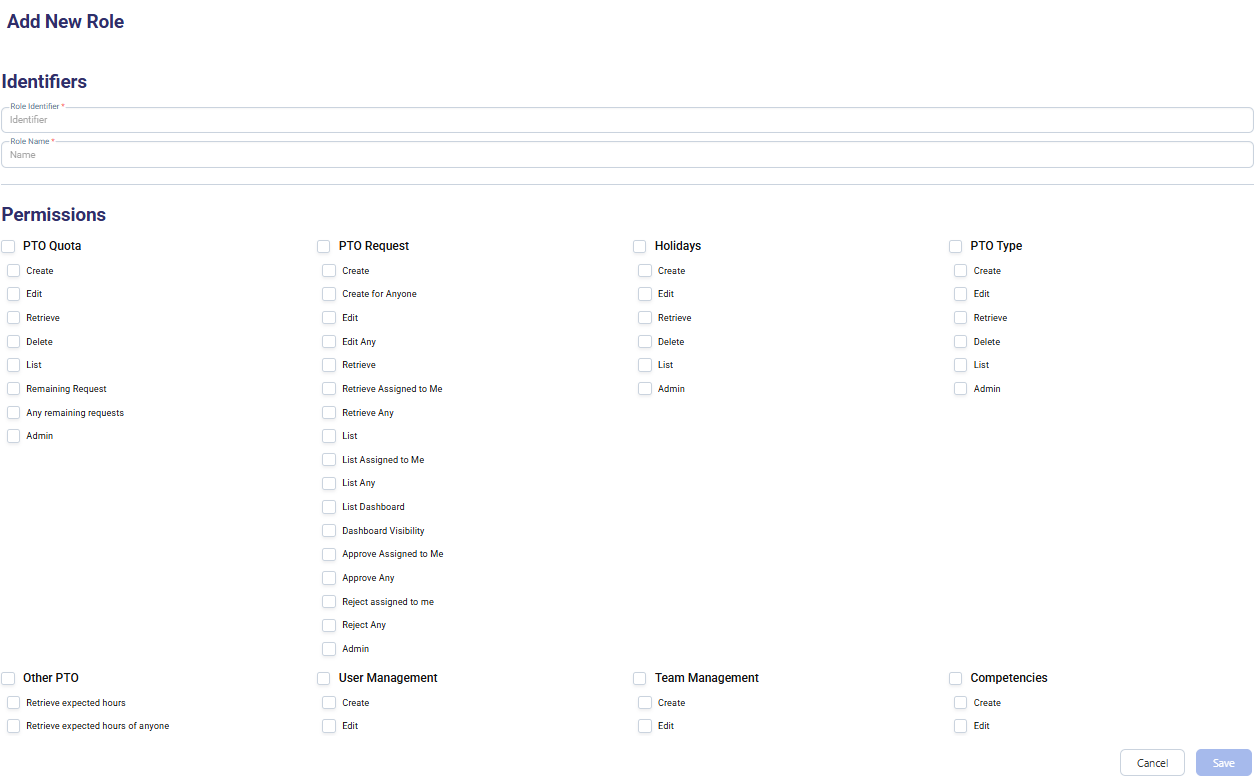
Add a New Role
-
-
Click New Permission Role to define a role identifier and permissions.
-
Enter a name for the new role under Identifier.
-
Use the Permissions matrix to define access rights for:
- PTO Requests
- Holidays
- PTO Type
-
Other administrative and functional modules (e.g. timesheets, schedule, locations, etc.)
-
Click Save to add the new role.
- Edit or delete a role as needed.

- Edit or delete a role as needed.
⚠️ Note: Only roles not actively assigned to users should be deleted to avoid permission issues.
Typical Use Cases
- HR & Payroll Compliance: Ensure accurate overtime calculations through predefined policies.
- Client Management: Maintain an up-to-date client directory for project tracking.
- Workplace Administration: Define work locations for employee assignments.
- IT Security Monitoring: Track login activity to identify unusual access patterns.
- Enterprise Configuration: Adjust company-wide settings for currency and risk assessment.
- Access Control: Grant employees appropriate system permissions based on roles.